JTAPI Encrypted Call Support
To enable support of encrypted calls the following actions will need to be performed
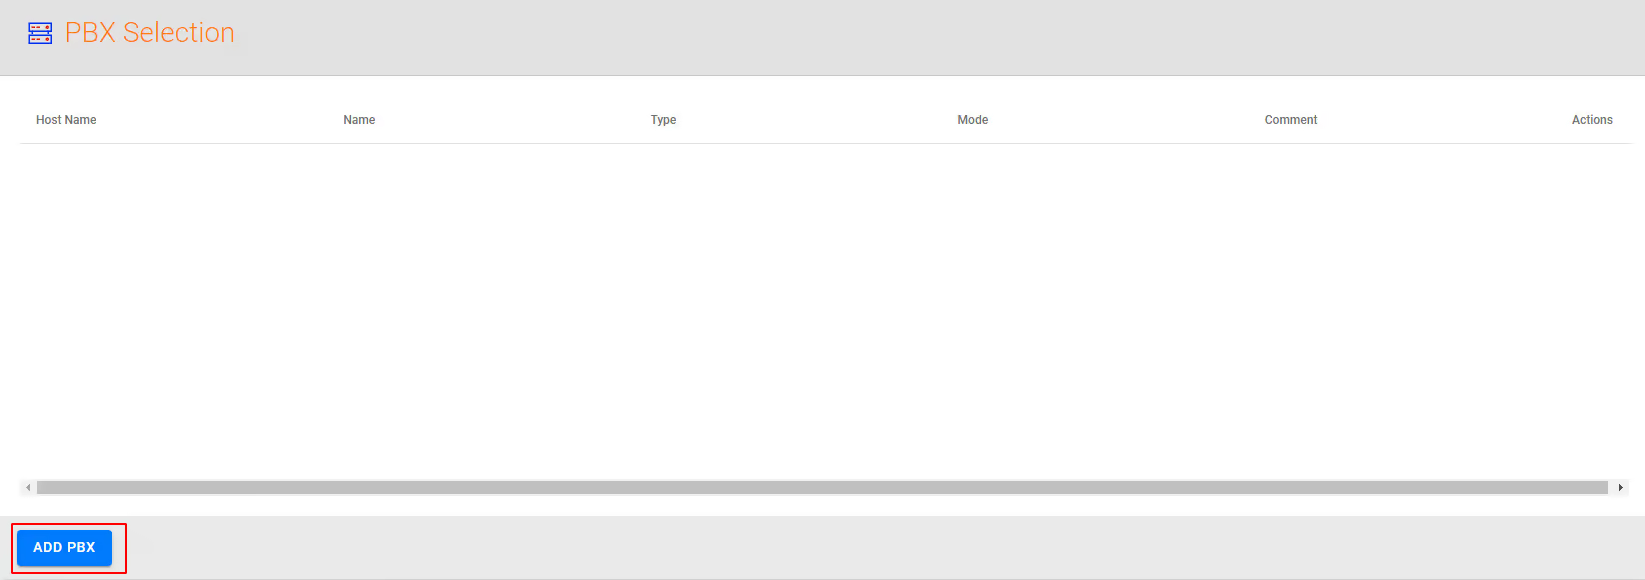
From within the CallReplay administration GUI
- Navigate to Call Managers and Add a PBX

- Add the appropriate details for the highlight boxes in the image
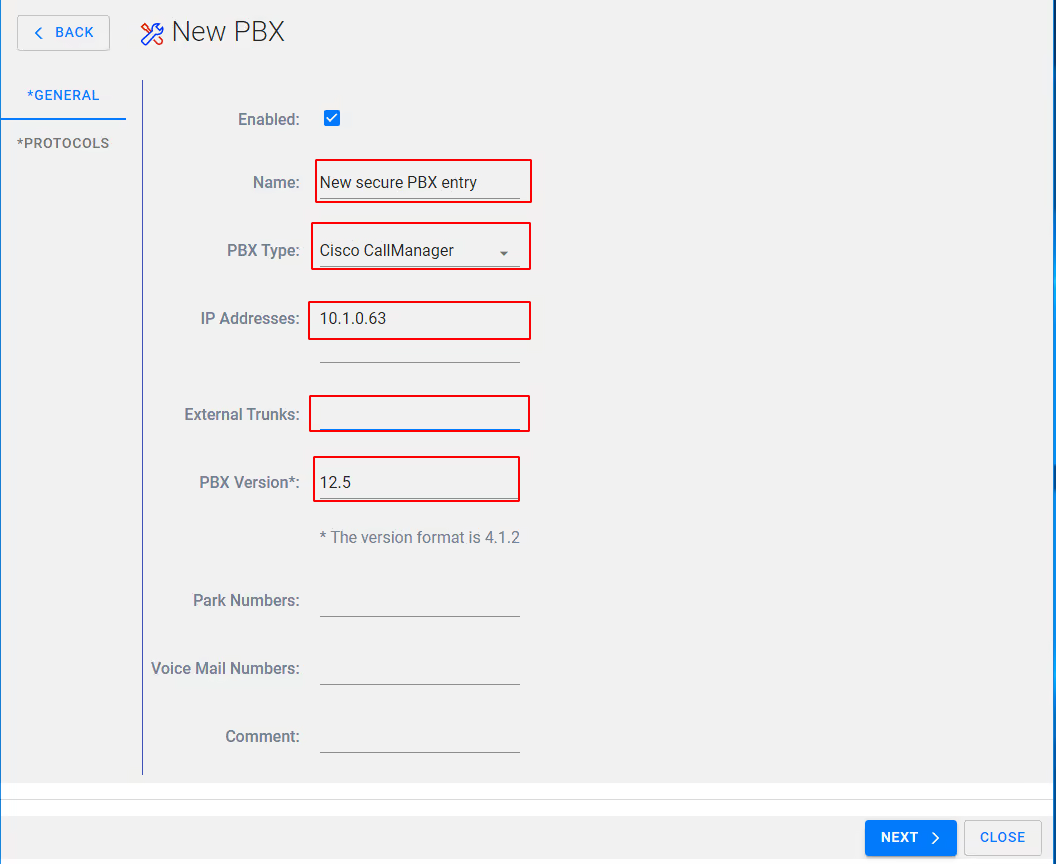
NOTE: Ensure IP addresses include Publisher and all subscribers, FQDN can be used but are not recommended.
Select Next, You will then be presented with the following protocols screen
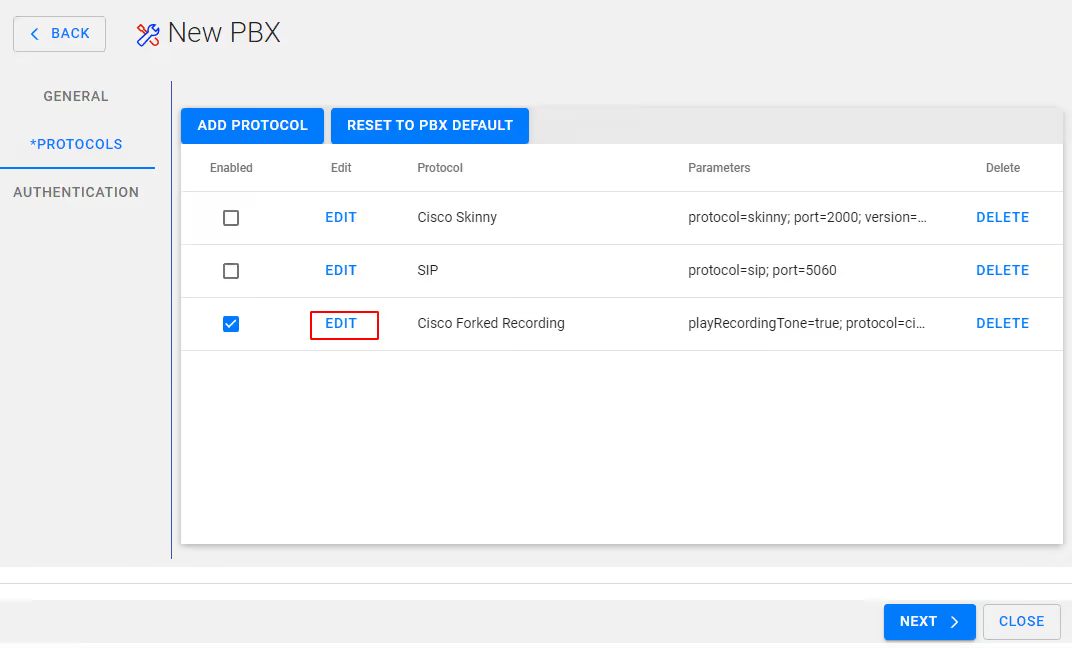
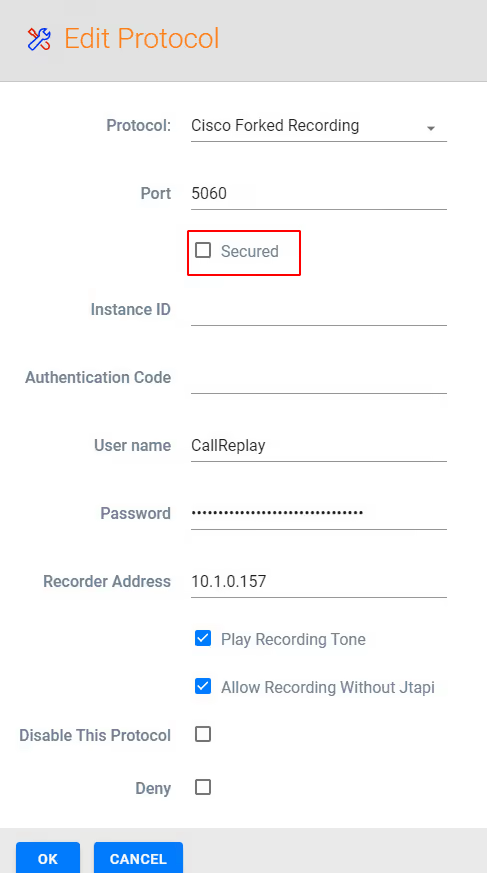
On Cisco Forked Recording - Select Edit and ensure Secured is enabled/checked
Select OK and Next
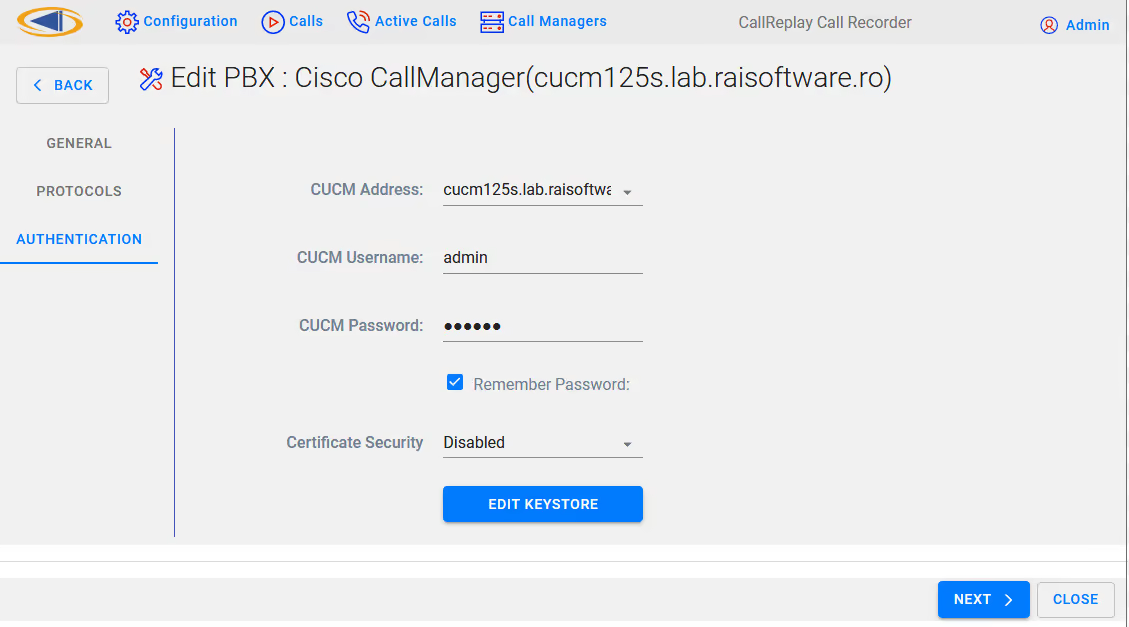
Fill out the connection details for your CUCM
select EDIT KEYSTORE,
Within Keystore Editor select + NEW to create a self sign certificate
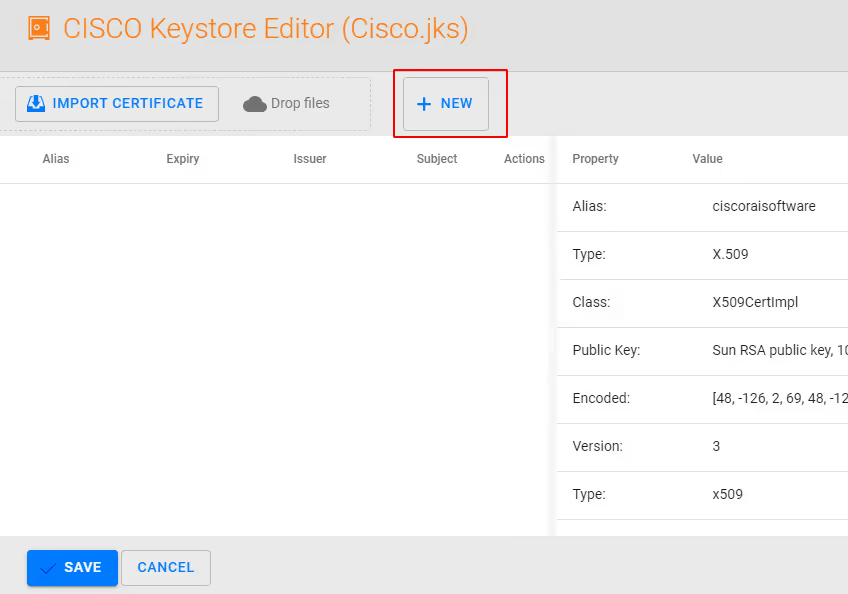
NOTE: you may also import your own certificate here from a trusted Certificate Authority in X.509 .PEM format
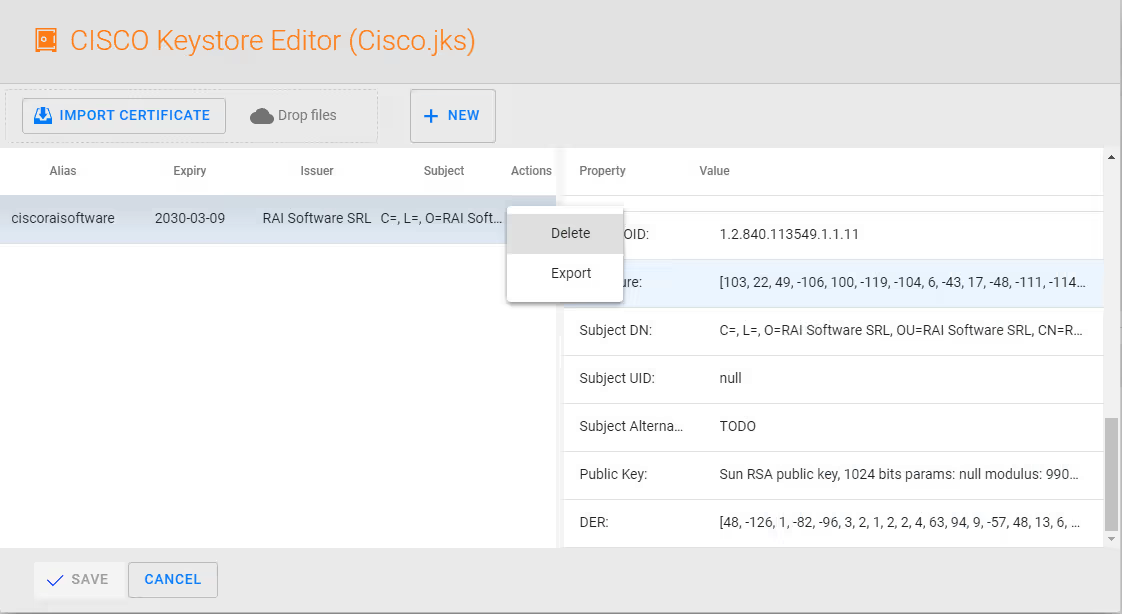
Next export the certificate, and return to Authentication page by selecting SAVE and then select NEXT.
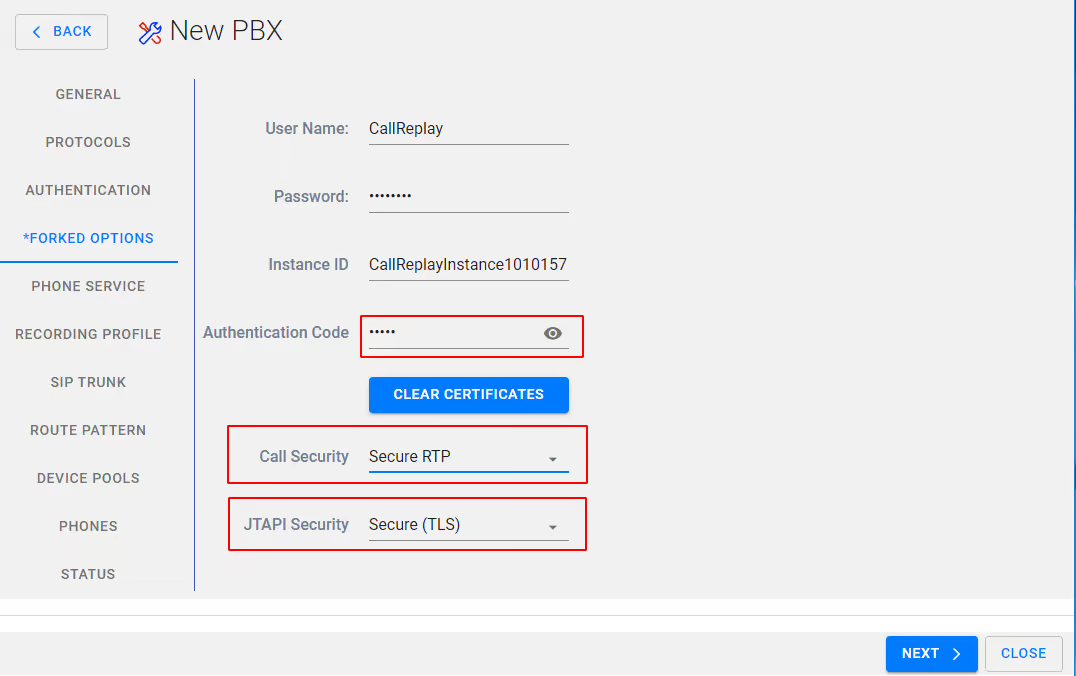
On the FORKED OPTIONS page ensure you have the required Call Security (Secure RTP) and that JTAPI security is set to Secure (TLS). Also make a note of the Instance ID and the Authentication Code by clicking the eye icon.
Select NEXT
If required Modify the Service Name and Description and verify the Phone service Address (this) is correct – this should be the IP address of the CallReplay server, then Select NEXT

If required modify the Profile name or leave as default, modify Call Search Space and Call Manager Group as required or leave as default,
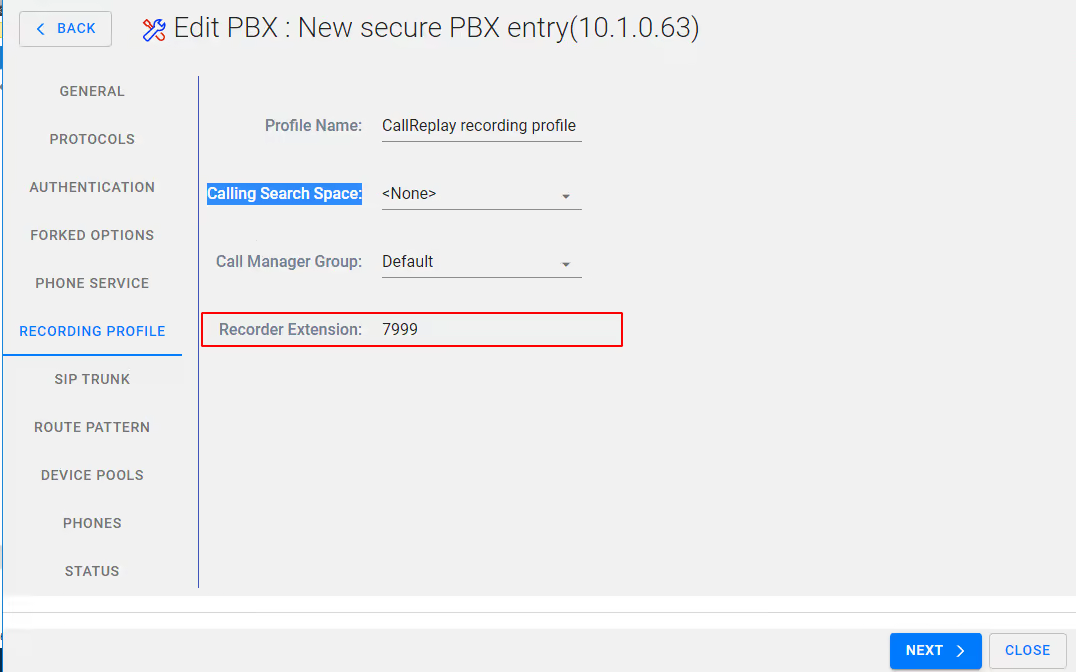
Leave Recording profile as default or modify if required, select Next
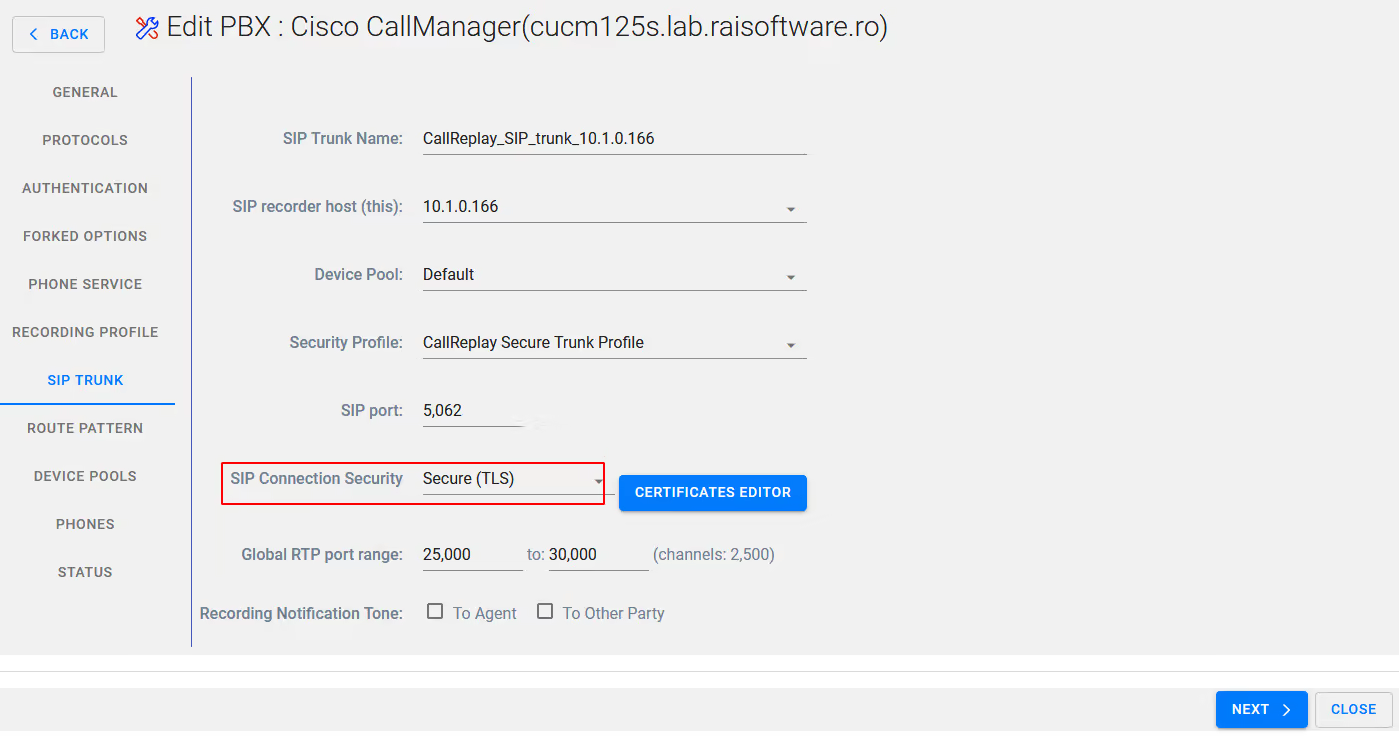
On the SIP trunk tab ensure that you have selected Secure (TLS) - you do not need to be concerned with Certificate editor if yu followed the earlier instructions.
Make any other requried modifications here or leave as default
Select Next
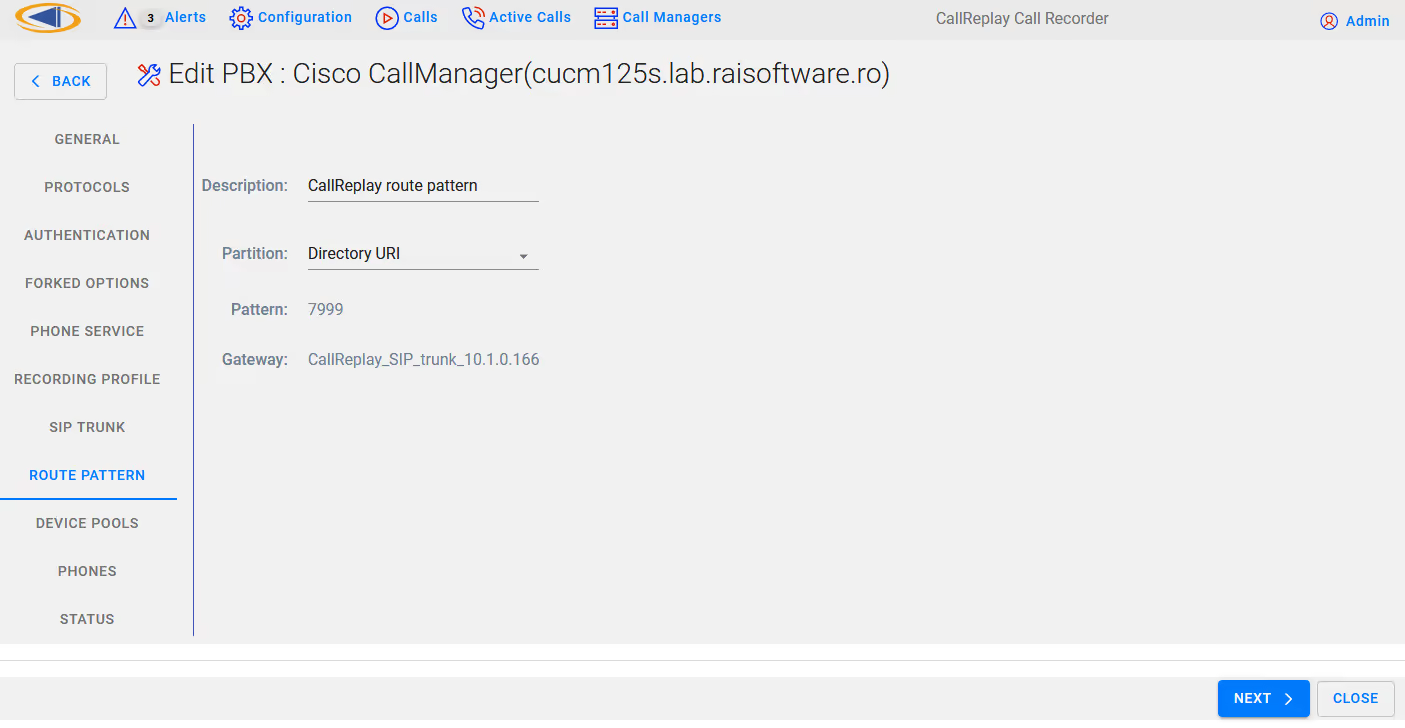
On the Route Pattern tab leave as default or make modifications if required
Select Next
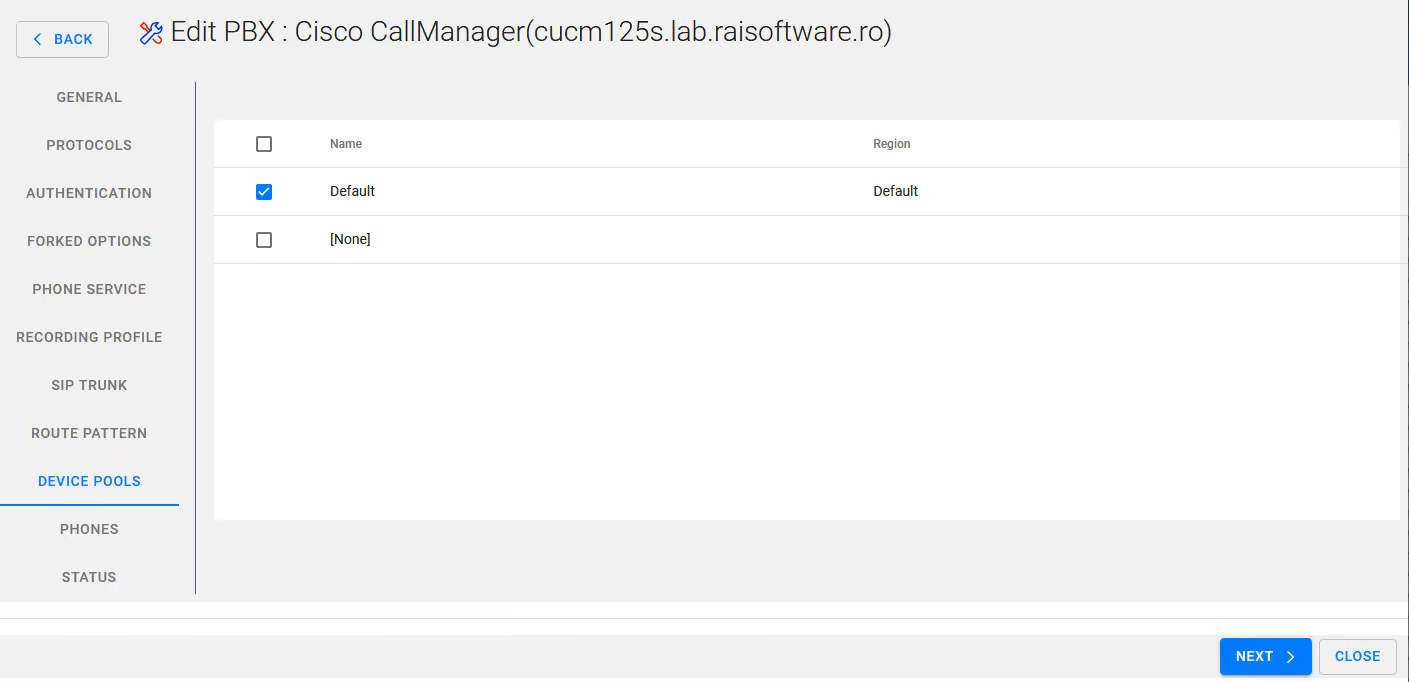
Selecrt your device Pool
Select Next
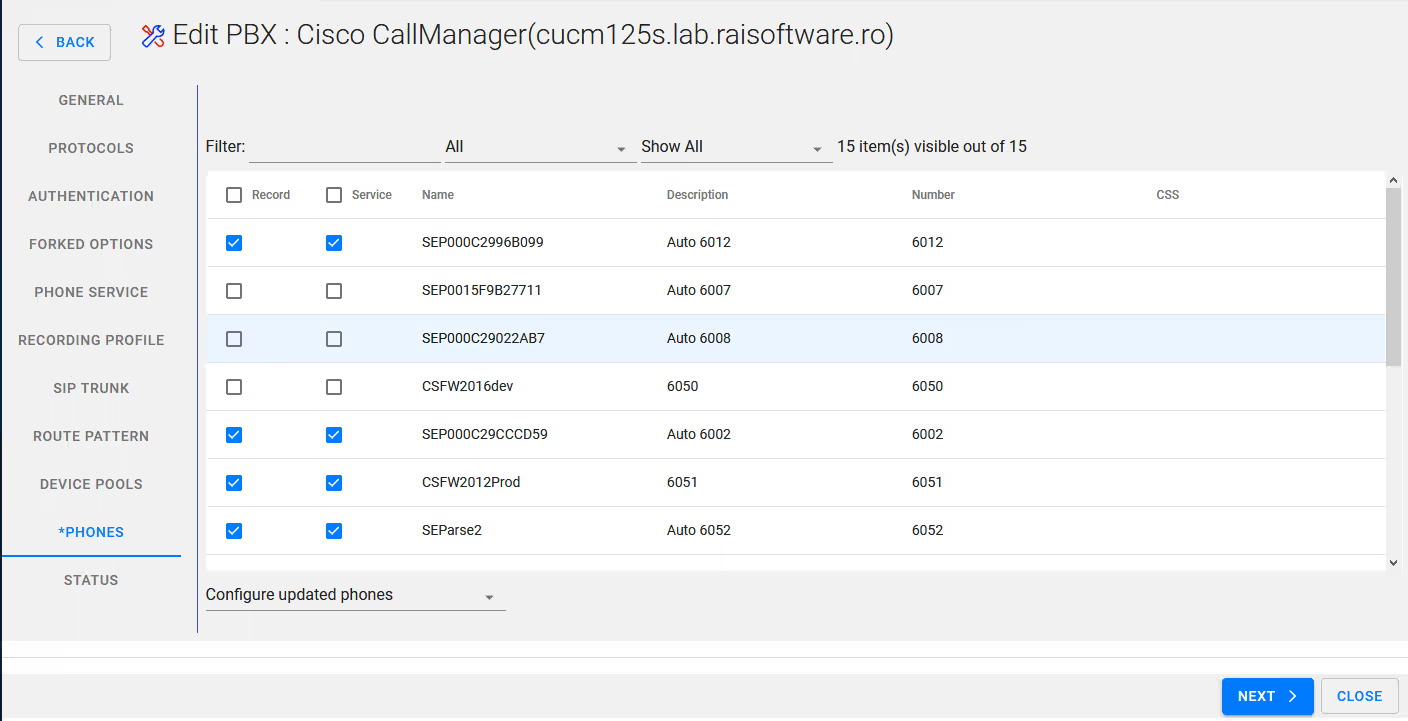
Select the desired phones / extensions for inclusion for recording
Select Next
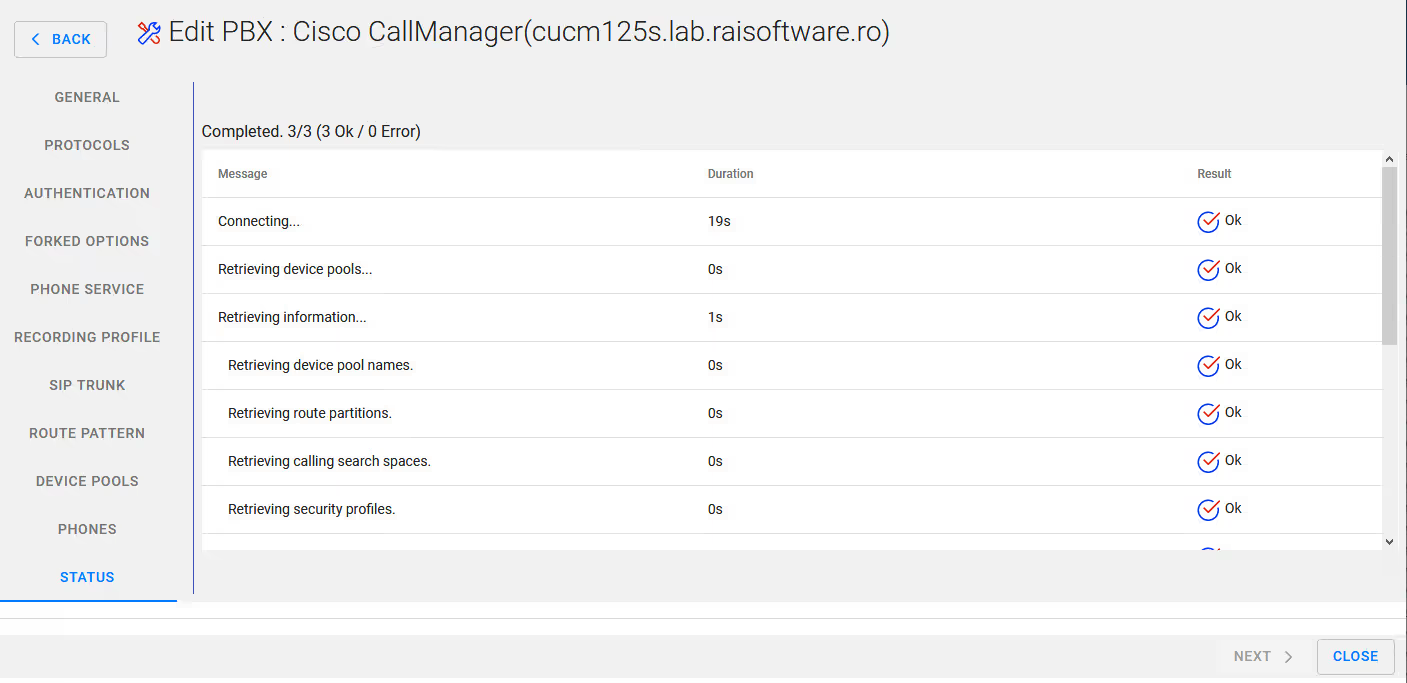
Close the wizard
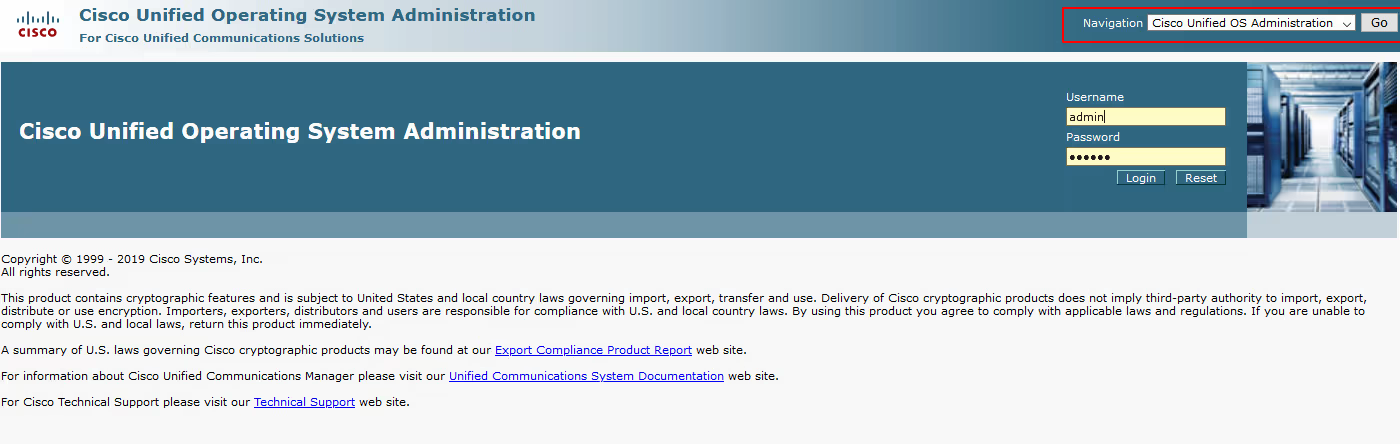
Then launch the web interface for CUCM (Cisco Unified Communications Manager)
And select Operating System Administration
Login into the interface as an administrator
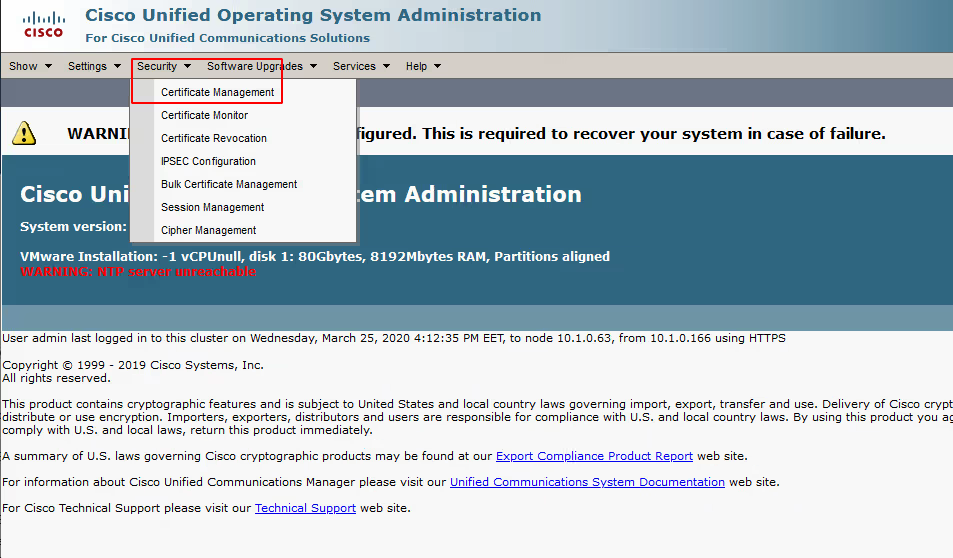
Then select Security / Certificate Management
Select Upload Certificate/Certificate chain

Select Upload Certificate/Certicate chain
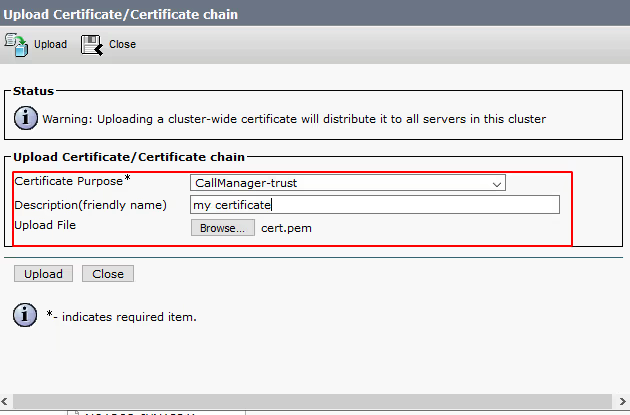
For Certificate Purpose* ensure to select CallManager-trust
Provide a freindly name for example : servername-callreplay
Select Browse from Upload File and locate the certificate you exported from the CallReplay keystore earlier or one that you have created from your own CA which is also imported to the CallReplay keystore store.
Select Upload
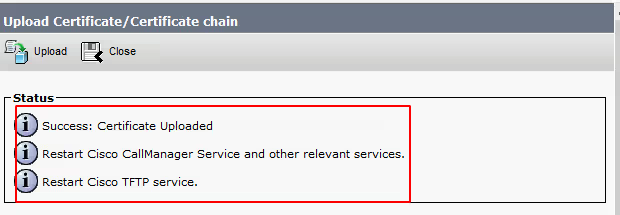
Once uploaded please note the requirement to restart CallManager and TFTP service on CUCM